Becoming a private hire driver in London opens doors to a flexible and rewarding career, allowing you to work with leading private hire operators like Uber and Bolt. The key to starting this journey is obtaining your Private Hire Driver Licence, commonly known as a PCO licence, issued by Transport for London (TfL).
This guide will navigate you through the entire process, ensuring you understand every requirement and step.
What is a PCO Licence and Who is Eligible?

A PCO Licence, or Private Hire Driver Licence, issued by Transport for London, is essential for anyone looking to work as a private hire vehicle driver in London, including minicab and Uber drivers. Valid for three years, it certifies drivers to legally operate and ensures adherence to safety and professional standards.
PCO stands for Public Carriage Office, the former department under Transport for London that oversaw the licensing of private hire drivers.
Basic Eligibility Requirements

Age
Must be at least 21 years old.

Driving Licence
Hold a valid driving licence (DVLA, Northern Ireland, or other EEA state) for a minimum of three years.

Right to Work
Have the legal right to work in the UK.
The PCO Licence Application Process
Applying for a PCO licence marks a crucial milestone for individuals pursuing a career as private hire drivers in London. The application process for a PCO licence meticulously ensures that candidates fulfil the stringent requirements for safety, professionalism, and comprehensive knowledge of London’s road network. This process not only prepares drivers to navigate the city’s streets safely but also upholds the high standards expected of London’s private hire industry.
How to Apply for a PCO Licence?
Step 1: Register and Obtain Application Pack
1. Visit the TfL Website:
Begin your application journey by accessing the Transport for London (TfL) website. Look for the Taxi and Private Hire section to find relevant information and the online application portal.
2. Create or Access Your Account:
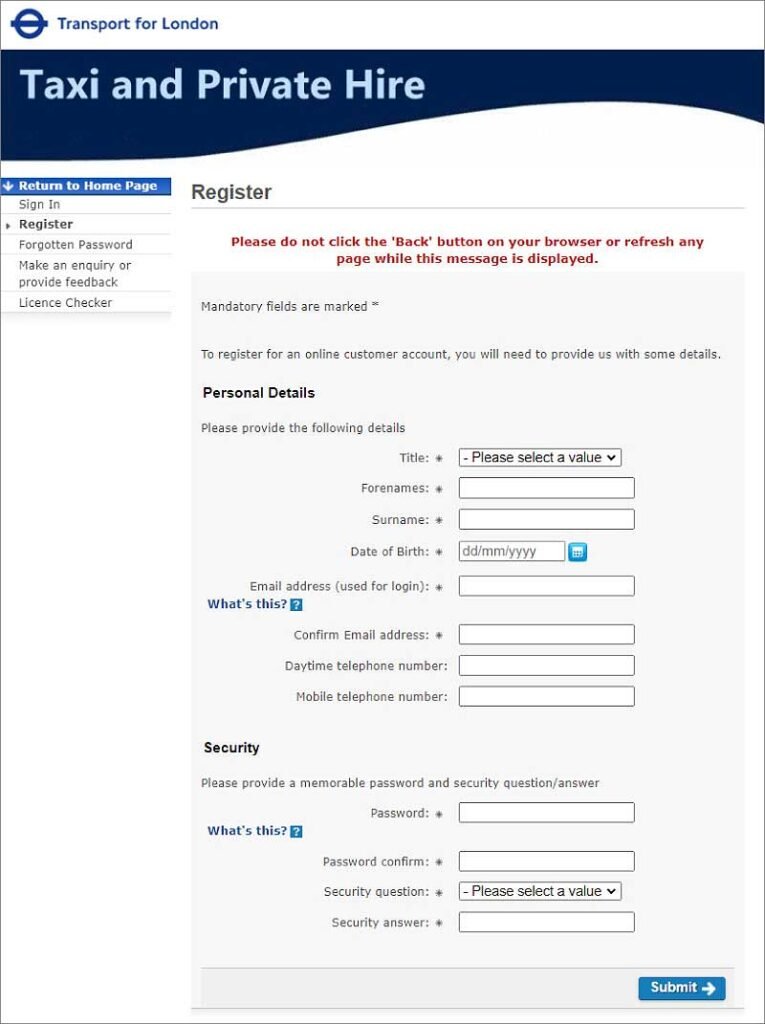
- New Users: If you’re a first-time user, locate the option to ‘create your online account.’ You’ll be directed to a registration form that asks for your basic personal and security information. This account is essential not only for your application process but also for future interactions with TfL, including vehicle licensing.
- Existing Users: If you already have an account, simply log in using your credentials.
3. Fill Out the Registration Form:
- Personal Details: Enter your name, address, contact information, and any other required personal details accurately to avoid any issues with your application.
- Security Information: Choose a secure password and provide answers to security questions, if applicable. This will help protect your account and personal information.
- Terms and Conditions: Ensure you carefully read the terms and conditions associated with the application process. Tick the box to indicate your agreement. This step is crucial for proceeding with your application.
4. Submit the Form:
Once you’ve completed all required fields and reviewed your information for accuracy, submit the form to create your account. A confirmation message or email will typically follow, indicating successful account creation.
5. Application Pack:
- Receiving the Pack: After registering, you will receive an application pack either directly through the website or via email. This pack includes all necessary forms, detailed instructions for each step of the application process, and information on the subsequent steps you need to take.
- Review Carefully: Take your time to go through the application pack thoroughly. It contains essential information and requirements that will prepare you for the rest of the application process.
Tips for a Smooth Registration Process:
- Documentation: Have all necessary personal documents and information at hand before starting the registration process to avoid delays.
- Screenshots: If the website provides helpful screenshots or guides for filling out the form, use them as references to ensure you input your information correctly.
- Privacy: Complete this process in a secure environment to protect your personal and security information.
- Questions: If you encounter any issues or have questions, look for a ‘Help’ section on the TfL website or contact their support services for assistance.
Step 2: Complete Enhanced DBS Check for PCO Licence
The DBS check is a critical component of the licensing process, ensuring that all applicants meet the high standards required for a Private Hire Driver. Here’s how to navigate this step:
1. Access the DBS Service Provider:
- Initiate the Process: Visit the website of First Advantage or the designated DBS service provider as directed by TfL.
- Registration: Click on “register” or the relevant button to start your DBS check application. You’ll be asked to enter some basic information to create your application profile.
2. Use TfL-Supplied Information:
- Organisation PIN and Secret Word: You will need a PIN and a secret word provided by TfL to proceed. This information ensures that your DBS check is correctly associated with your PCO licence application.
- Enter Details: Carefully input the PIN and secret word exactly as provided, avoiding any errors that could delay your application.
3. Complete the DBS Application Form:
- Fill Out the Form: Answer all the questions on the DBS application form. This will include personal information, address history, and other details necessary for the DBS check.
- Accuracy is Key: Ensure all information is accurate and complete. Mistakes or omissions can lead to delays or issues with your application.
4. Identification Verification:
- Post Office Verification: Once your online application is complete, you’ll need to verify your identity. TfL or the DBS service provider will direct you to take your identification documents to a participating Post Office. There may be a small fee for this service.
- Documents: Bring the required original documents (e.g., passport, driving licence, utility bills) as specified by the DBS service provider or TfL for verification.
5. Payment and Submission:
- Fee: The DBS check typically costs around £54. This fee is subject to change, so check the current cost when you apply.
- Complete Submission: After verifying your ID and paying the fee, your DBS application will be fully submitted. You will receive an acknowledgement or confirmation of submission from the service provider.
6. Receive Your DBS Certificate:
- Processing Time: The DBS certificate usually arrives within two weeks, but times can vary. Keep an eye on your mail or the email address provided during registration for any updates.
- DBS Update Service: Consider subscribing to the DBS Update Service for a small fee. This service simplifies future checks and is beneficial for license renewals, making it easier to maintain your eligibility without going through the full DBS process again.
Additional Tips:
- Stay Informed: Keep track of your application’s progress. If there’s an option to track your DBS check online, make use of it.
- Prepare Documents: Organize and review your identification and other required documents in advance to ensure a smooth verification process at the Post Office.
- Act Promptly: Begin this step as soon as possible, as the DBS check is time-sensitive and can influence the overall timeline of your licensing process.
Step 3: Undergo Medical Check by a GP
Ensuring the health and safety of private hire drivers and their passengers is paramount, which is why a medical examination is a crucial part of the application process. Follow these steps to complete your medical check:
1. Obtain the Medical Declaration Form (TPH/204):
- From TfL: You will receive the medical declaration form, TPH/204, as part of your application pack from Transport for London (TfL). This form is essential for recording your medical examination results.
- Download Option: You may also download the form from the TfL website. Ensure it’s the latest version to avoid any processing delays.
2. Schedule an Appointment with Your GP:
- Early Booking: Contact your GP’s office as soon as possible to book a medical examination appointment. Waiting times can vary, so arranging this early in your application process is advisable.
- Inform GP: Make sure your GP understands that the examination is for a PCO licence application. This will help them prepare and focus on the relevant health checks.
3. Visit an Optician for a Sight Test:
- Separate Appointment: In addition to the GP examination, you’ll likely need to have your vision tested by a qualified optician. This is to ensure you meet the visual standards required for driving.
- Documentation: Ask the optician to complete the relevant section of your TPH/204 form or provide a separate report that confirms your visual acuity and any corrective measures (e.g., glasses or contact lenses).
4. Complete the Medical Examination:
- GP Assessment: During your appointment, your GP will assess your overall health, focusing on conditions that might affect your ability to drive safely. This will include a review of your medical history and a physical examination.
- TPH/204 Form: Ensure your GP fills out the TPH/204 form thoroughly, including any relevant details about your health status and fitness to drive.
5. Understand the Costs:
- Fees: Be prepared to pay for the medical examination and sight test. Costs can vary; for example, a GP may charge around £100 for the examination, and an optician might charge £40 for the sight test and form completion. These fees are not covered by the NHS and are the applicant’s responsibility.
Additional Tips:
- Promptness: Address this step early in your application process to avoid delays. Waiting times for GP and optician appointments can be lengthy.
- Documentation: Keep copies of all medical documents and forms submitted for your records.
- Clarification: If you have any medical conditions that might affect your application, discuss these openly with your GP. Transparency is key to ensuring your fitness to drive is accurately assessed.

Step 4: Submit Application to TfL
This final step involves compiling all your documents, completing any remaining sections of your application, and submitting everything to Transport for London (TfL). Here’s how to ensure a smooth submission process:
1. Gather Required Documents:
Before you proceed with the submission, ensure you have all the necessary documents ready. This includes:
- Photograph: A recent, clear, and compliant photograph of yourself. It should be a full-color, passport-style photo with a neutral background, showing your full head and shoulders. Ensure it meets TfL’s specifications to avoid delays.
- DVLA License Check Code: Obtain a check code from the DVLA via the Gov.uk website. This code allows TfL to view your driving record and is valid for 21 days. Aim to submit your application soon after obtaining this code to ensure it’s valid at the time of TfL’s review.
- HMRC Tax Check: Ensure you understand the tax requirements as a self-employed driver. You’ll need to have registered with HM Revenue and Customs (HMRC) and understand the process for obtaining an HMRC Tax Check Code, which will be necessary for license renewal.
2. Complete the Application Form:
- Review and Fill: Double-check that every section of your application form is completed accurately. This includes personal details, medical information, the Enhanced DBS check reference, and any additional information TfL requires.
- Incorporate Documents: Attach or upload the required documents, including your photograph, DVLA license check code, and any other supporting documents that are part of your application.
3. Review Your Application:
- Accuracy: Before submitting, review your application thoroughly to ensure all information is accurate and complete. Errors or omissions can lead to processing delays.
- Document Checklist: Use a checklist to confirm you’ve included all necessary documents and information. This helps prevent missing items that could delay your application.
4. Pay the Application Fee:
- Fee Information: Check the current application fee on the TfL website. Fees may vary, so it’s important to confirm the amount before paying.
- Online Payment: Follow the instructions on the TfL application portal to make your payment. Ensure you receive confirmation of your payment, as this is essential for your application to be processed.
5. Submit Your Application:
- Final Check: Give your application one last review, then submit it through the TfL portal or as directed in your application pack.
- Confirmation: Await confirmation from TfL that your application has been received. Keep a record of any submission receipts or confirmation numbers.
Additional Tips:
- Timing: Consider the timing of your submission, especially in relation to the DVLA check code’s validity. It’s advisable to submit your application on the same day you obtain the check code to avoid delays.
- Supporting Information: If you’re unsure about any part of the application process, consult TfL’s guidance documents or contact their support team for assistance.
- Preparation: Having all documents prepared and reviewed before starting the submission process can significantly streamline your application.
Once the application process is complete and TfL has reviewed it, you will be contacted to schedule your assessments at one of the TfL centres. There are three tests or assessments that you will need to pass. Please refer to the details below:
Step 5: Pass Topographical Skills Assessment
Achieving your PCO license requires passing the TfL Topographical Skills Assessment, a crucial step that evaluates your navigation and geographical understanding of London.
What You Need to Know:
- Assessment Focus: The computer-based test examines your map reading skills, including using indexes, identifying locations, planning routes, and understanding compass points, all through the A-Z Master Atlas of Greater London.
- Pass Mark: You need a score of 60 out of 100 to pass. Your ability to plot routes accurately and interpret map symbols is key to success.
- Cost: The fee for the first attempt is £36, with re-sits priced at £16.
How to Prepare:
- Study the A-Z Master Atlas of Greater London: Familiarise yourself with its layout and symbols, as this will be your main resource during the test.
- Practice Map Reading: Enhance your skills in finding locations and planning routes efficiently.


Step 6: Demonstrate English Speaking and Listening Proficiency
As part of the PCO licensing requirements, you must demonstrate proficiency in English speaking and listening, ensuring effective communication with passengers.
What You Need to Know:
- Assessment Format: The test is a 15-20 minute conversation, aimed at evaluating your ability to communicate in English. It’s conducted at a Transport for London Driver Assessment Centre or securely via online video or telephone link through PeopleCert.
- Pass Mark: A score of 60 out of 100 is required to pass.
- Cost: The initial attempt is £36, with re-sits available at £16.
How to Prepare:
- Practice English Conversations: Enhance your speaking and listening skills through regular practice. This can be through language exchange meetups, online platforms, or conversation with native speakers.
- Visit PeopleCert’s Website: For detailed information and preparation tips, explore the resources available on PeopleCert’s website, the designated service provider.
Step 7: Undergo SERU Assessment
The final hurdle in obtaining your PCO license involves passing the SERU (Safety, Equality, and Regulatory Understanding) assessment. This step ensures you’re well-versed in the key areas of safety, equality, and your regulatory obligations towards passengers.
What You Need to Know:
- Assessment Coverage: The SERU assessment evaluates your understanding of drivers’ responsibilities, relevant policies, passenger needs, safeguarding, and safety considerations. It also tests your reading and writing skills in these contexts.
- Format: This is a computer-based test, consisting of multiple-choice questions and sentence completion exercises, administered by TfL staff.
- Pass Mark: You need to achieve a pass mark of 60%.
- Cost: The fee for the first attempt is £36, with a re-sit fee of £16.
How to Prepare:
- Study the PHV Driver’s Handbook: This handbook is your primary resource for understanding the regulations and expectations for PCO drivers. Focus on sections related to safety, equality, and customer service.
- Utilise Online Resources: TfL provides an online assessment guide to help you prepare for the SERU test. Make use of these resources to familiarize yourself with the question format and content areas.

License Awarded
If you meet all the requirements, pass all three assessments, and have paid the necessary fees, you will be issued a PCO license. This license allows you to drive for any licensed operator in London, offering flexibility in your choice of work.
Explore our informative how-to articles on becoming a driver for popular licensed operators in London:
PCO Licence Cost
The cost of obtaining a PCO license in London can vary based on factors such as application fees, medical examination fees, background check fees, and fees for any required training. Here’s a summary of all costs related to PCO Licence:
Summary Costs – How much does it cost to get a PCO Licence in London?
| Description | Amount |
| Medical Declaration (GP Surgery) | £100 |
| Vision Test – Optician | £40 |
| Application Fee – Transport for London | £310 |
| Enhanced DBS Check | £54 |
| SERU Assessment | £36 |
| Topographical Skills Test | £36 |
| ELR – Speaking and Listening Test | £36 |
| Total | £610* |
Read more: PCO Licence Cost: Understanding the Fees for Private Hire Drivers in London
PCO Licence Renewal
Your PCO licence will need to be renewed every three years. During the renewal process, you will not be required to undergo the topographical, speaking and listening, and SERU tests again. However, you will need to review your application, undergo a criminal record check, and may be required to make another medical declaration.
Frequently Asked Questions (FAQs)
Do you need PCO for Uber?
Yes, to drive for Uber in London, you need to have a valid PCO (Private Hire Driver) license. It is a requirement set by Transport for London (TfL) for private hire drivers operating in the city.
How long does a PCO license last?
A PCO license typically lasts for a period of three years. After that, it needs to be renewed to continue operating as a private hire driver in London.
Do you need a PCO Licence outside London?
The PCO license requirement is specific to London. If you intend to operate as a private hire driver outside of London, the licensing regulations may vary depending on the specific region or city. It is recommended to check the local authority’s requirements in the area where you plan to work.